FAQ: How do I successfully upgrade my control device firmware?

There are a multitude of reasons why firmware sometimes does not succeed, usually user error. However, it does seem to be more common with Apple devices as they update their OS very regularly and this often causes conflicts with externally connected, non-Apple devices. This is common to all manufacturers and is not specific to Icon.
How do you give yourself the best chance of ensuring the firmware upgrades successfully?
NEVER:
1. Touch your machine while the update is in progress
2. Update whilst using a USB hub of any kind
3. Interrupt the upgrade process
4. Disconnect the devices
ALWAYS:
1. Update one device at a time
2. Disconnect all other devices
3. Ensure your internet copnnection and power supplies are rock solid
REMEMBER:
1. Your devices (i.e. Pro X and an XS) are separate devices and must be updated individually
2. If you don’t need to update the firmware - ask yourself the old adage ‘if it ain’t broke, don’t fix it’
3. Take it SLOWLY - read ALL AVAILABLE INSTRUCTIONS
Pro X users NOTE that you MUST install an APP panel to your Pro X before updating firmware, if your firmare is 1.17 or below. Here is a link to an article specifically designed to guide you through this process (for the Pro X only):
https://support.iconproaudio.com/hc/en-us/articles/360059102672-Updating-QCon-Pro-X-To-iMap-V2-20-Firmware-V1-18-New-DAW-Selection-Mode
1. Navigate to the iMap download from the product page on the website.
To save confusion, this is the iMap software required once the new APP panel is installed (v.18 and above) for the Pro X:
2. Save the file to your computer.
3. Install ‘the set up wizard’ by clicking ‘Install’.
4. Click ‘finish’
5. Now, make sure your device is turned on (and not the extenders if you have these). Ensure it is linked directly to your PC/laptop - do NOT use a USB hub.
6. Now, it’s time to open up iMap (which you have just installed) and install the firmware. Click on the bottom left of the iMAP software where it says ‘Firmware Upgrade’. Ensure the warnings (i.e. ‘connect ONLY the device you wish to upgrade’) are observed. When you wish to proceed, click ‘OK’.

If you are installing an M+ and and X+ for example, you do not need two iMaps. Just click the title of the iMap and it will switch to the required version (i.e. M+ or X+).
You will now go through a five step process -
it's extremely important to read the notes attached as you do this.
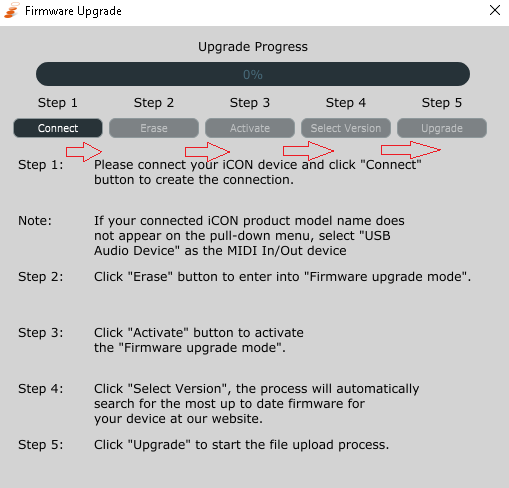
7. Click ‘connect’ and select the device, (remember only the device that you wish to upgrade should be connected. Click ’erase’. Your existing firmware is now erased.
8. Click ‘Activate’ and select the Qcon device. It should appear as version 1.00 - do not be concerned by this, as this is the ‘base’ version of the firmware.
9. Click ‘Select version’ - this should then search for the latest firmware on the website automatically. This is why it is so important that internet connections are solid. Select the latest version of the firmware. DO NOT power off during this process.
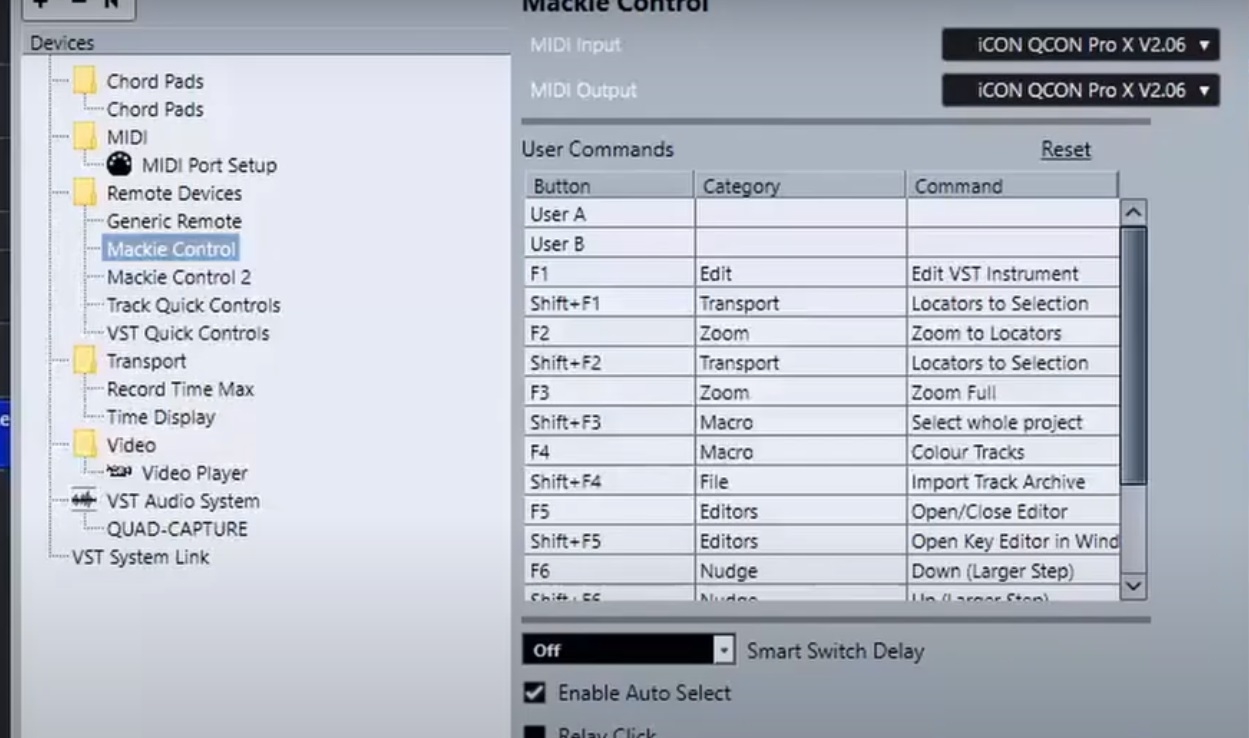
10. When the process is completed, power down your device and turn it on. Go to your DAW settings (i.e. Studio set up - Mackie Control devices - in Cubase) to select your device,
11. Repeat these steps to update the firmware for your extender units if you have them, ensuring that units you are not updating are disconnected and again connecting directly to the computer, not a USB hub.
When powering up, you will now have 4 options;
MCP Mode– (Mackie Control Protocol) – Used for all DAWs except Logic and Pro Tools
Logic Mode – Only used to control Logic
HUI Mode – Only used to control Pro Tools
User Defined Mode – Used to create custom control maps (does not currently work with Pro Tools)
Select the DAW you wish to use and happy recording!
TIPS and Notes
Cubase users:
If notes musical notes are triggered by button or fader use, go to Studio Setup, click MIDI port set up, uncheck the box ‘In All Midi’ in the new QCON Pro X or XS row. Click OK. For users of other DAWs, go to All MIDI in settings in your settings and de-select. This should solve the problem.
Comments
0 comments
Article is closed for comments.